iOS Push Configuration
For configuring Push Notification in iOS platform do the following:
Upload APNS certificate to Dashboard
First you will have to create an APNS certificate and upload in the dashboard to be able to send push notifications in iOS. Follow the steps below to do that :
- Create an APNS certificate
- Convert resultant certificate to .pem format
- Upload .pem file to MoEngage Dashboard
*Follow the links on each step to complete it.
Project Settings Changes:
1. Enable Push Notifications Entitlement:
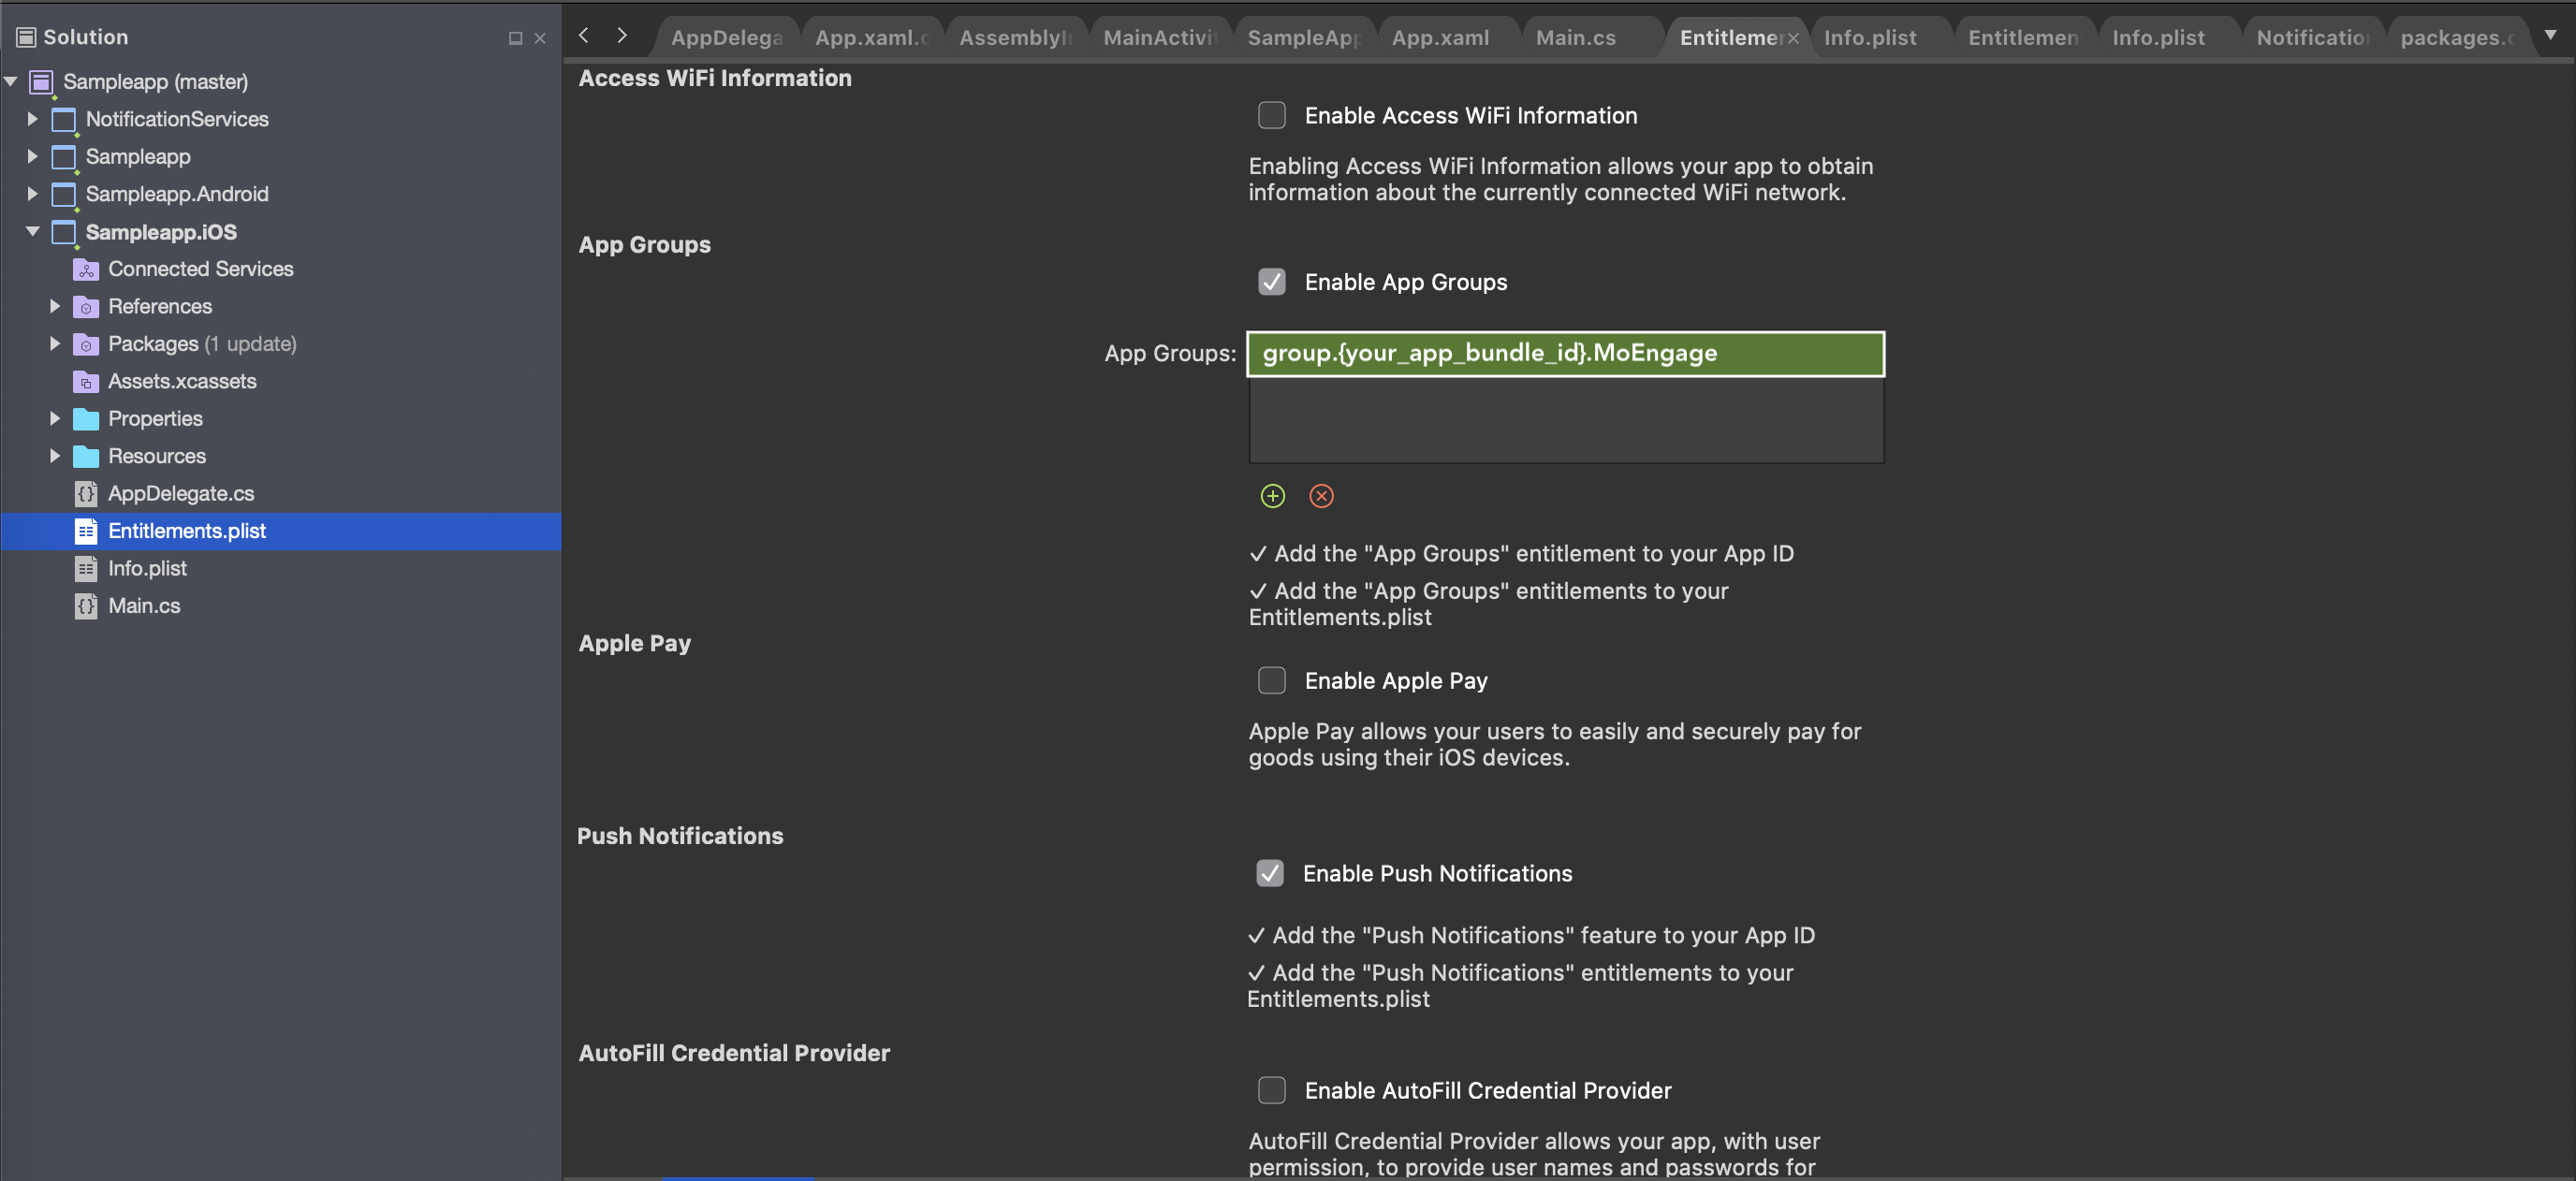
Go to your iOS Project's Entitlements.plist file and do the following:
- Enable Push Notifications Capability.
- Enable App Groups and set/create an app group ID(The name of your app group should be
group.{your_bundle_id}.MoEngage)
App Groups
MoEngage SDK uses App Group IDs to share info between iOS App Target and Notification Service Extension target.
2. Enable Remote Notifications Background Mode
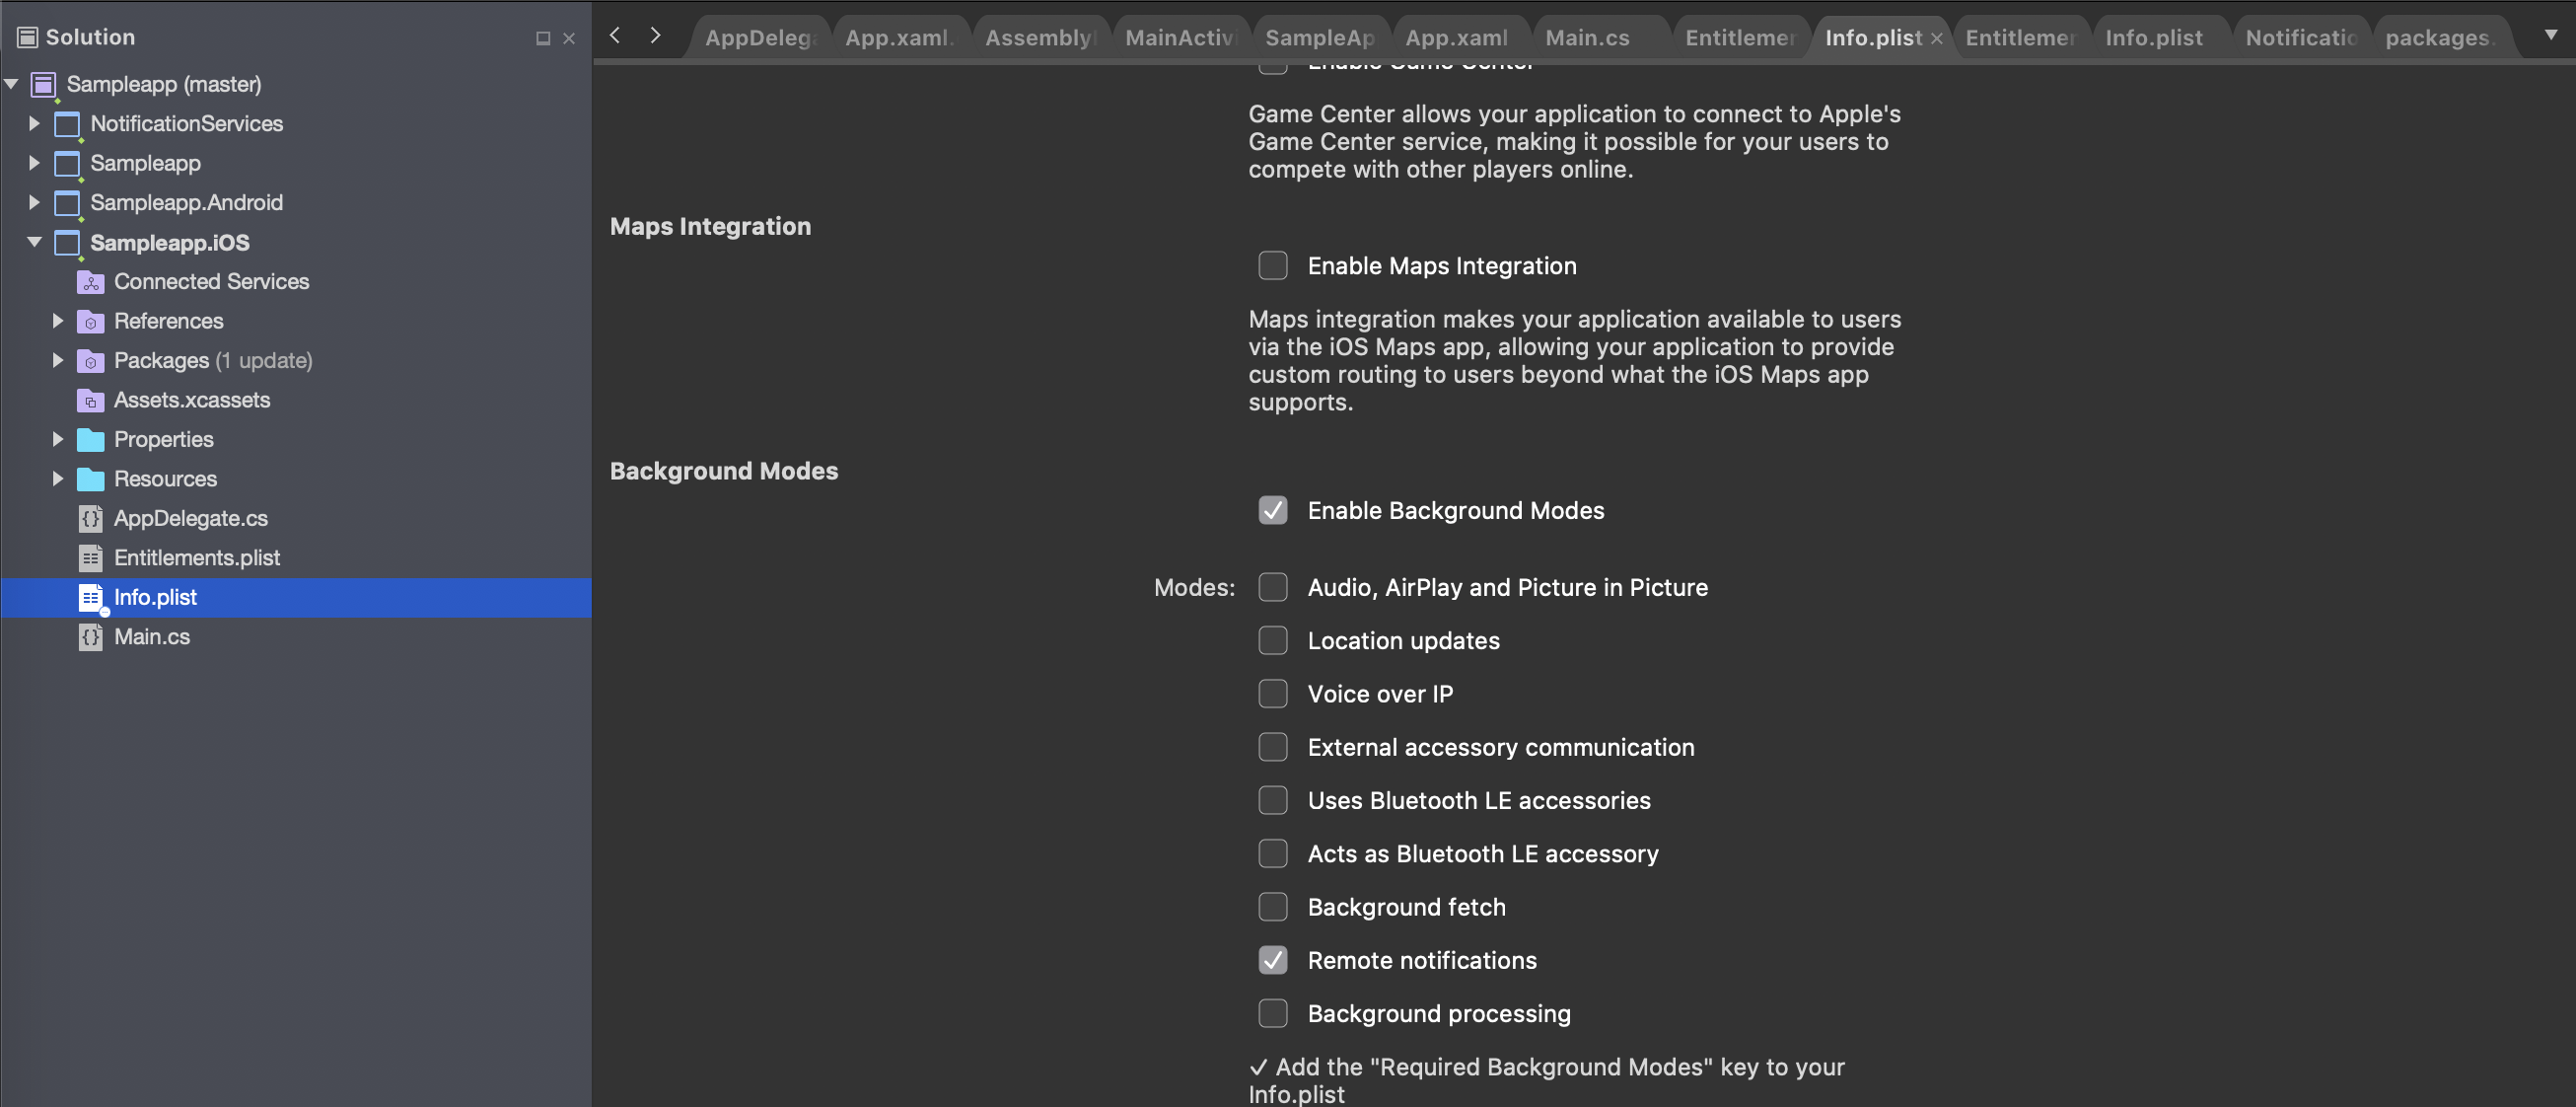
Go to your iOS Project's Info.plist file and Enable Remote Notifications Background Mode as shown below:
Push Registration:
- First, you will have to set the
UNUserNotificationCenterdelegate inFinishedLaunching()method of AppDelegate file. This is for getting the callbacks when notifications are clicked. And make sure to set it before initializing the SDK.
using UserNotifications;
using MoEngageXamarin.iOS;

namespace Sampleapp.iOS
{

    [Register("AppDelegate")]
    public partial class AppDelegate : global::Xamarin.Forms.Platform.iOS.FormsApplicationDelegate
    {
        public override bool FinishedLaunching(UIApplication app, NSDictionary options)
        {
        		global::Xamarin.Forms.Forms.Init();
            LoadApplication(new App());

          //Make sure to set UNUserNotificationCenter delegate before Initializing the SDK.
           	UNUserNotificationCenter.Current.Delegate = new MyUNUserNotificationCenterDelegate();

#if DEBUG
            MoEInitializer.InitializeDevWithAppID("Your App ID", app, options);
#else
            MoEInitializer.InitializeProdWithAppID("Your App ID", app, options);
#endif

            return base.FinishedLaunching(app, options);
        }
- Provide the App Group ID set in the
Entitlements.plistfile inFinishedLaunchingmethod of App Delegate file:
MoEngage.SetAppGroupID(<AppGroupID Set in Entitlement.plist>);
- Call
RegisterForRemoteNotificationWithCategories()method for registering for Push Notification.
// Call RegisterForRemoteNotificationWithCategories method to register for Push Notification
MoEngage.SharedInstance().RegisterForRemoteNotificationWithCategories(null, (NSObject)UNUserNotificationCenter.Current.Delegate);
- Callback for token registration
On successful registration of push token you will receive RegisteredForRemoteNotifications() callback in your AppDelegate class of iOS project, call SetPushToken() of MoEngage SDK here as shown below:
public override void RegisteredForRemoteNotifications(UIApplication application, NSData deviceToken)
{
  MoEngage.SharedInstance().SetPushToken(deviceToken);
}
- Callbacks on receiving and clicking the notifications
You would receive the following callbacks on receiving(only when app in foreground) and clicking Push Notification. Make sure to call MoEngage SDKs UserNotificationCenter() method in DidReceiveNotificationResponse() method as shown below:
public class MyUNUserNotificationCenterDelegate : UNUserNotificationCenterDelegate
    {
        // Callback on receiving notification when app in foreground
        public override void WillPresentNotification(UNUserNotificationCenter center, UNNotification notification, Action<UNNotificationPresentationOptions> completionHandler)
        {
            completionHandler(UNNotificationPresentationOptions.Alert);
        }

        // Callback on clicking notification
        public override void DidReceiveNotificationResponse(UNUserNotificationCenter center, UNNotificationResponse response, Action completionHandler)
        {
            MoEngage.SharedInstance().UserNotificationCenter(center, response);
            completionHandler();
        }
    }
Rich Notification Support
In order to support rich notifications in your app, you will have to make use of Notification Service Extension for your iOS app. Notification Service Extension for your iOS app can be used for the following:
-
Add media support in Notifications: Post iOS10 Apple has given us the ability to add images, gifs, audio, and video files to the notifications and this can be done using the Notification Service Extension.
-
For supporting Inbox Feature: Notification Service Extension is also used to save the received notifications which can later be shown in the App Inbox.
-
For Updating the Notification Badge count: MoEngage makes use of the extension to update the notification badge count and doesn't send badge in the notification payload.
-
For Tracking Notification Impression: We can track if a Notification is received by the device using the Notification Service Extension.
Follow the below steps to set up Notification Service Extension in Xamarin:
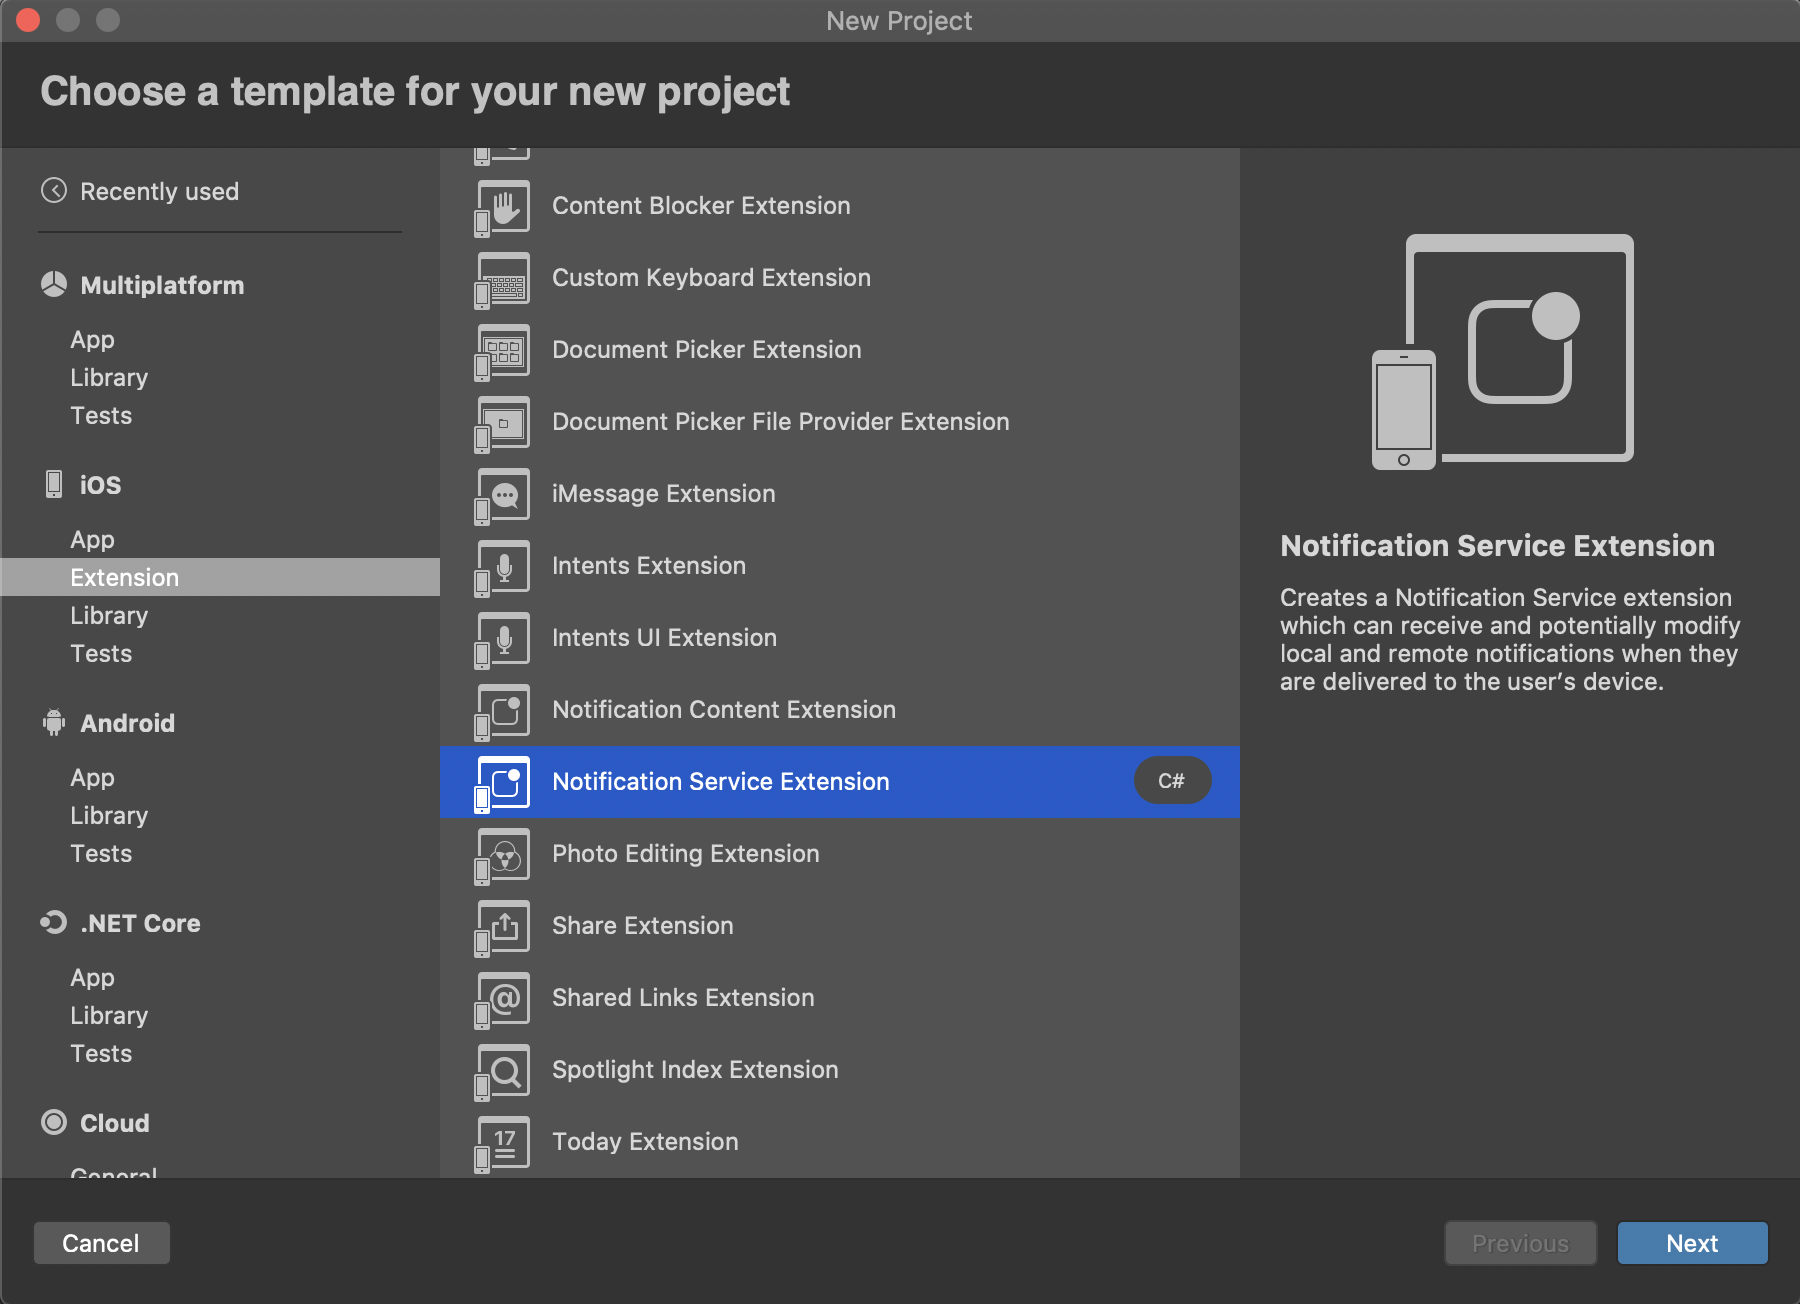
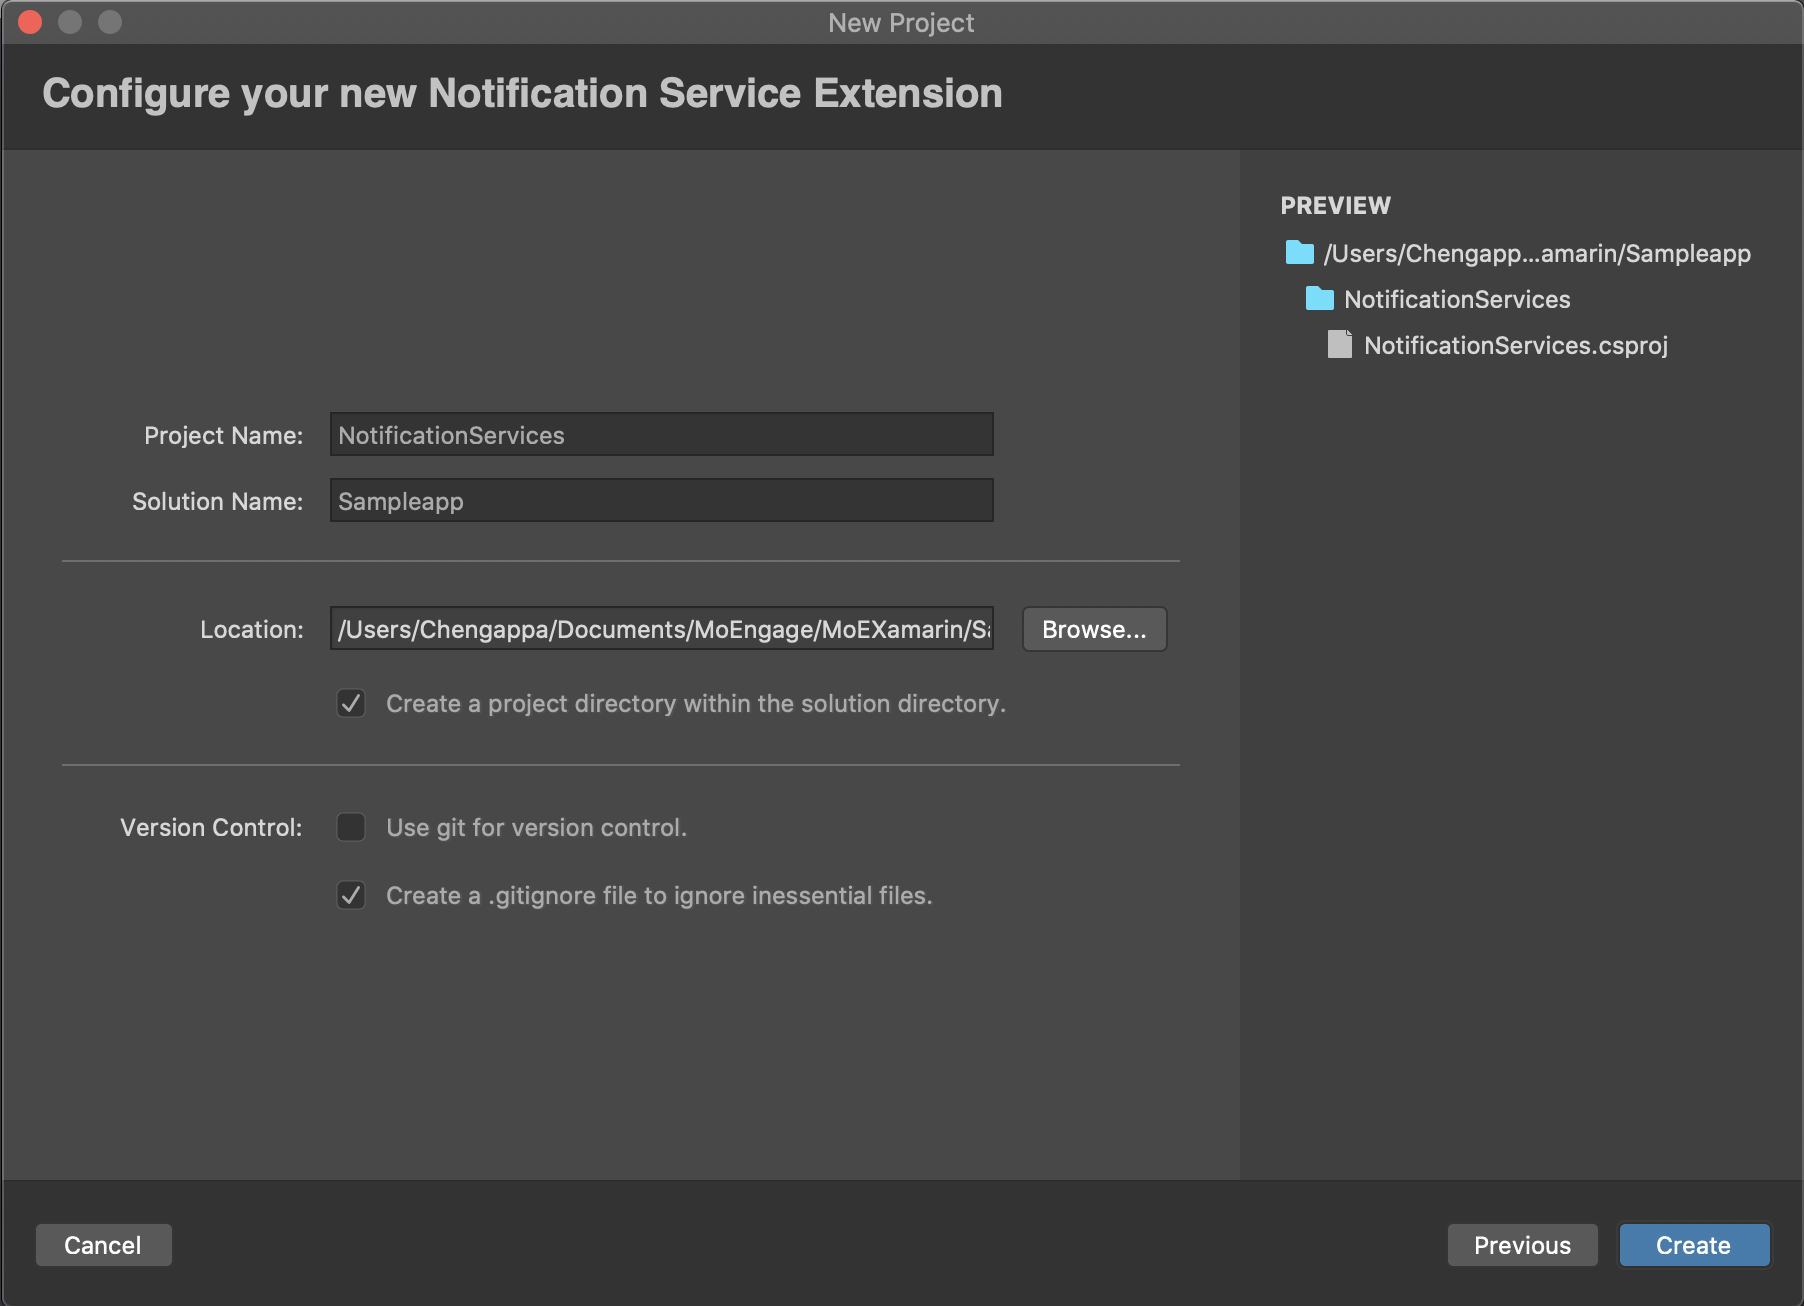
- Right-click on the main solution project and click on
Add > Add New Project. Post this select iOSExtension > Notification Service Extensionwhile choosing a project template.
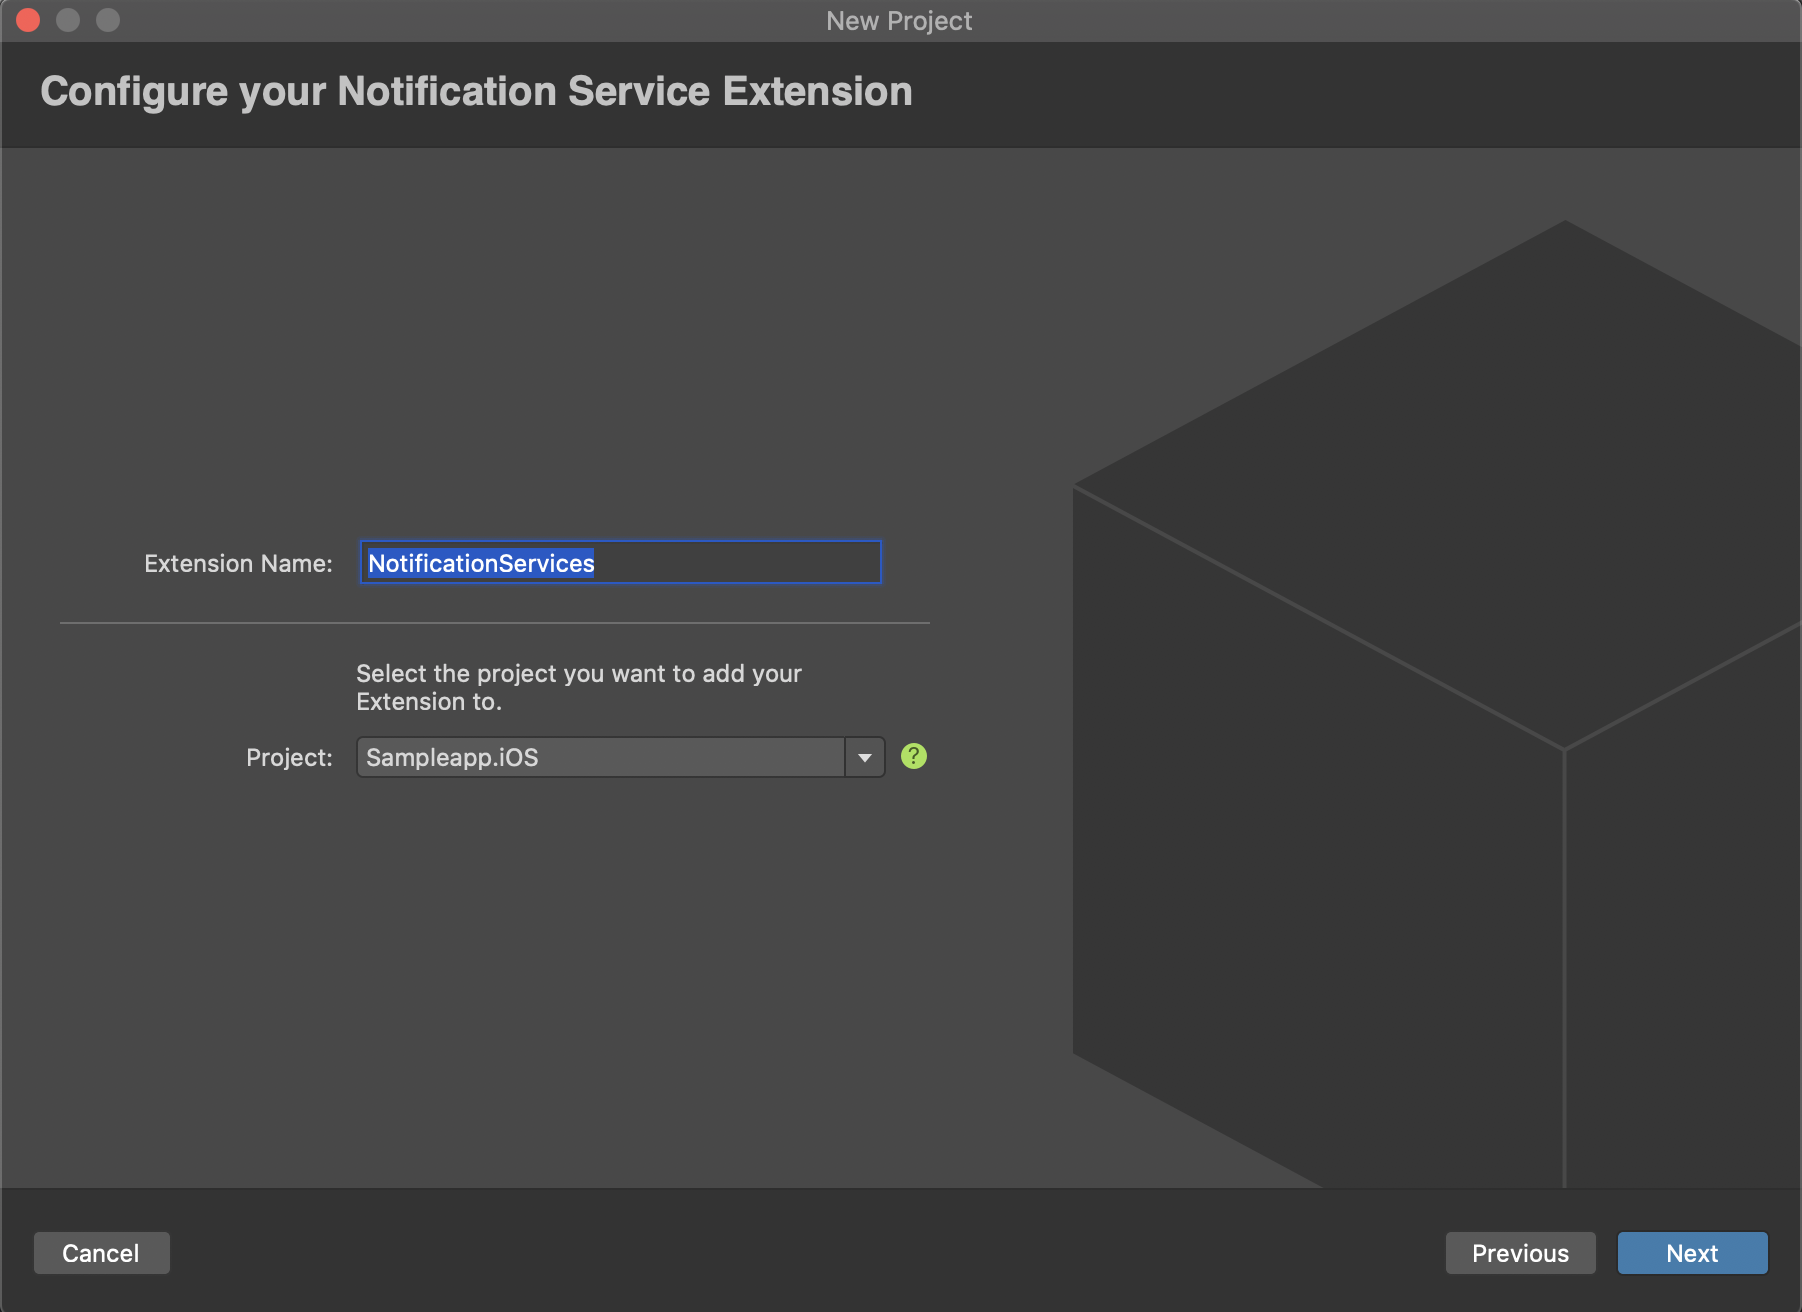
- Set the extension name and set the
Projectto iOS App Project.
- Review the changes in the third step and click on the
Createbutton.
- Make sure to set the deployment target greater than iOS 10. This is because Notification Service Extension was introduced by Apple from iOS 10.

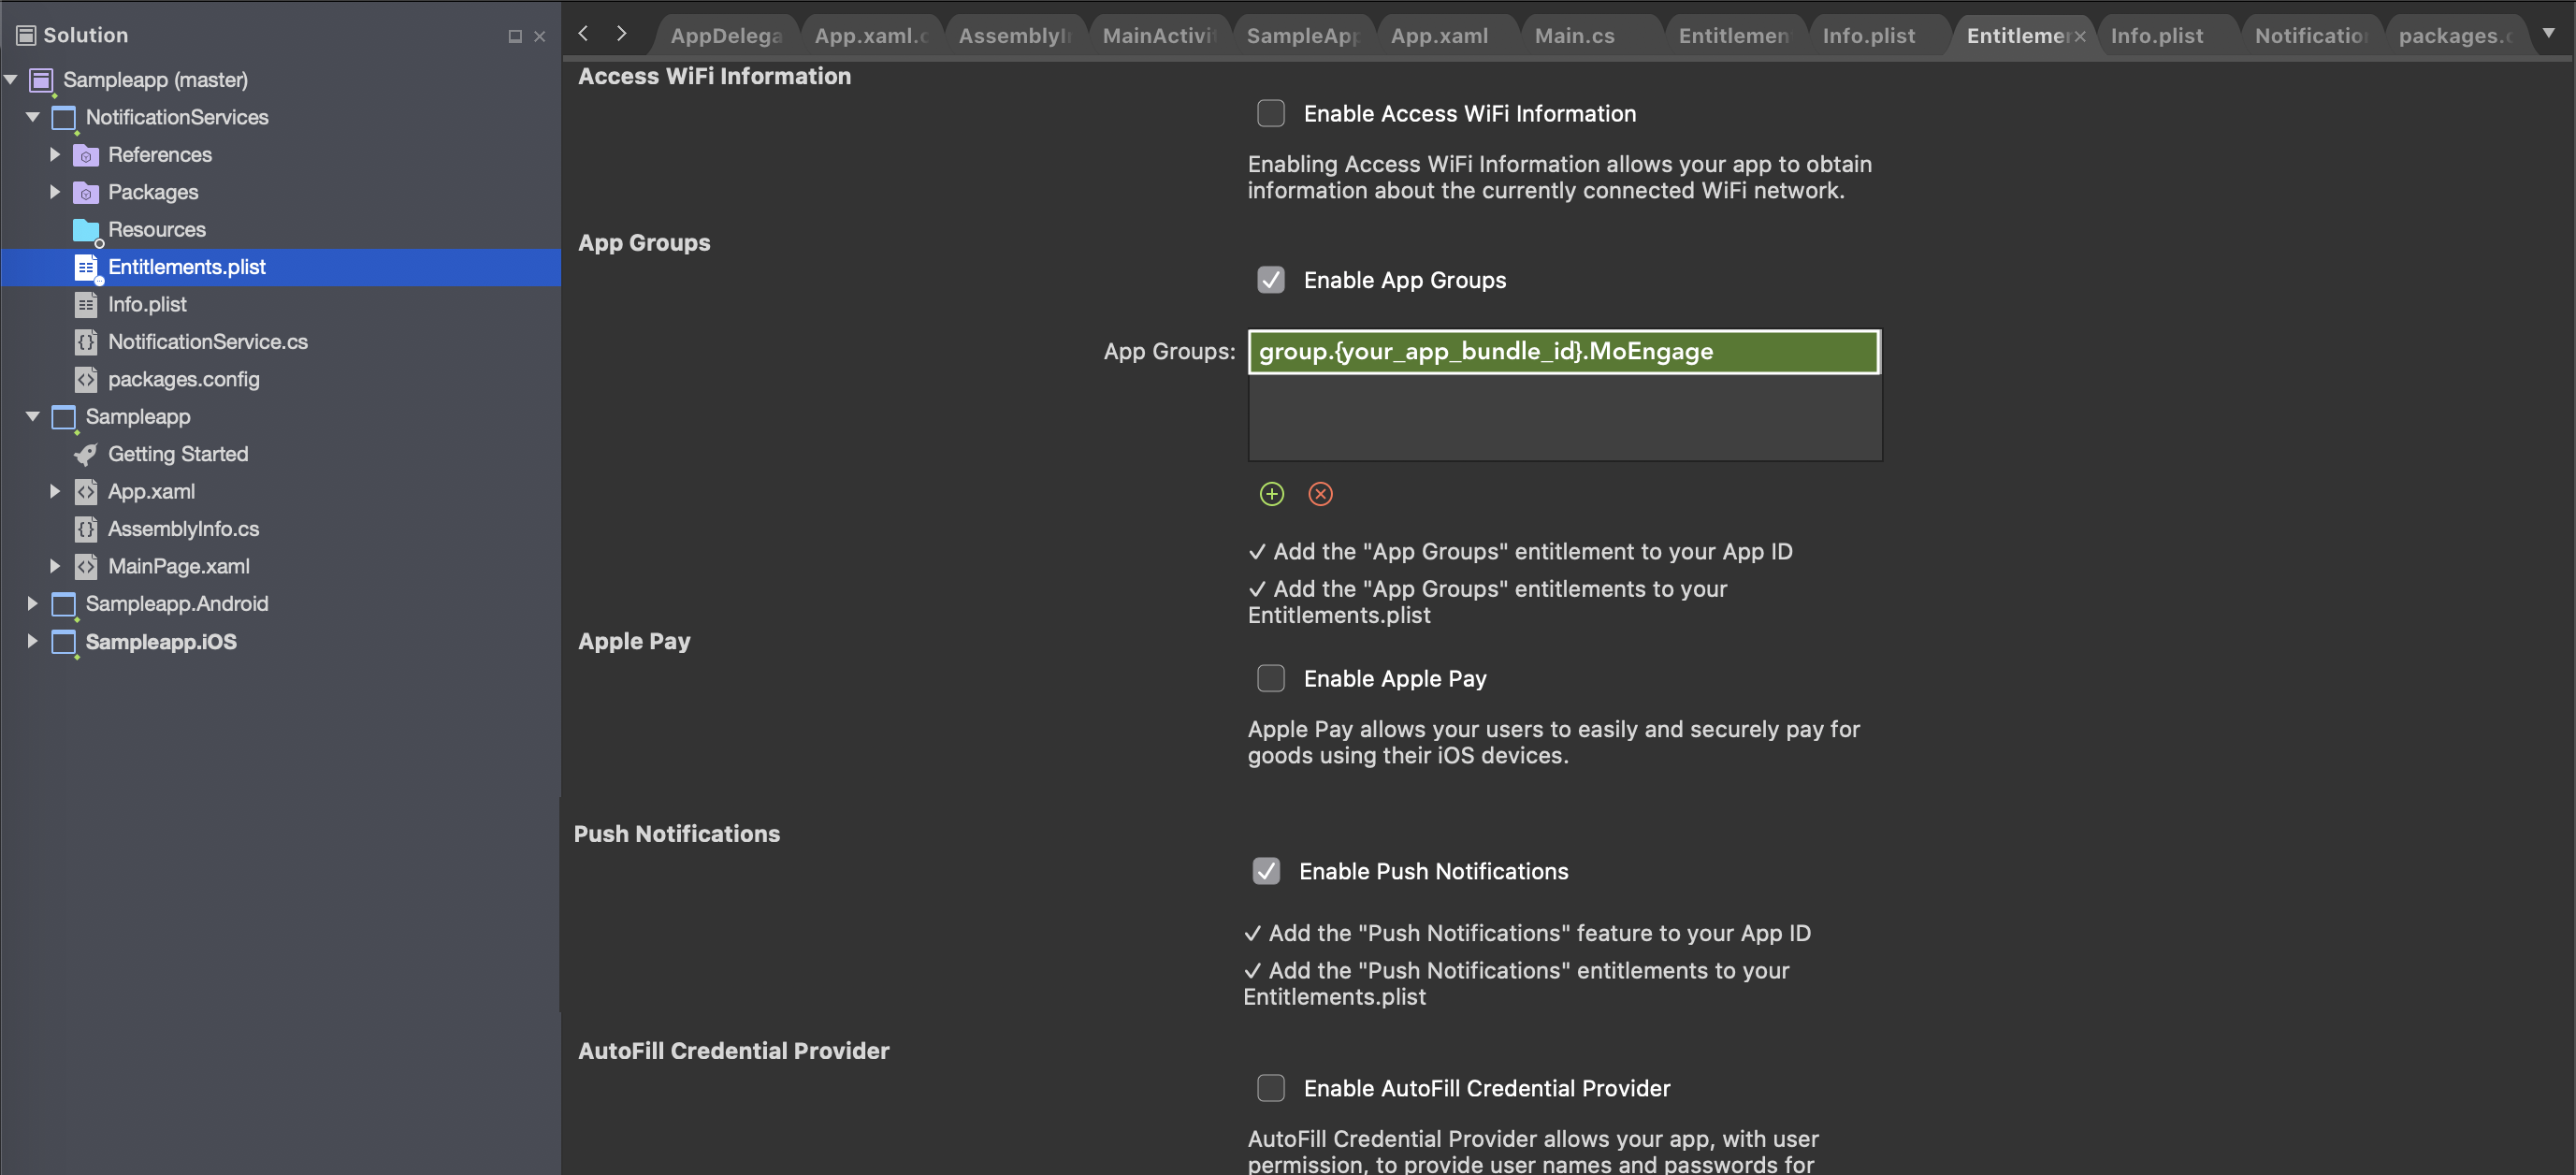
- Go to
Entitlements.plistfile in Extension project and enable the following:
a) First Enable Push Notification Capability
b) Then Enable App Groups and set the App Group ID to the same ID which was set in the App's Entitlement file.
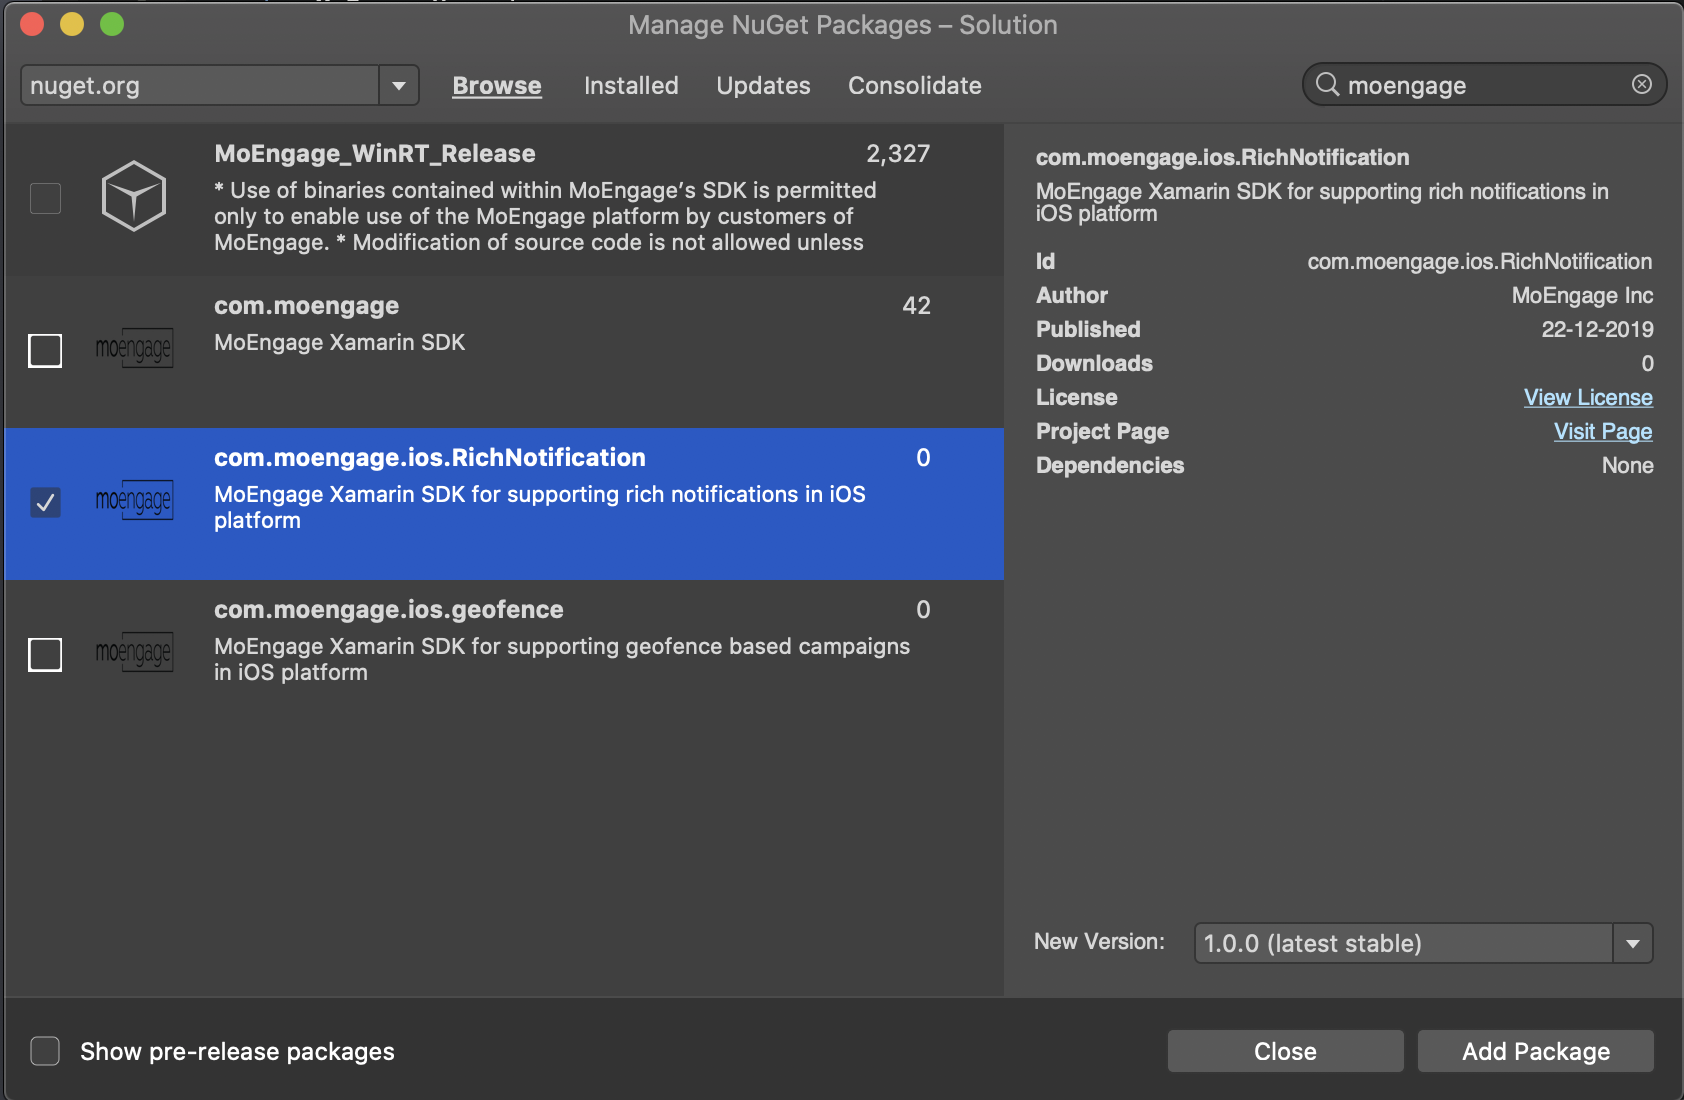
- Now add
com.moengage.ios.RichNotificationNuGet package to Notification Service Extension Project.
- Code Implementation:
UseMoEngageXamarin.iOSnamespace and callSetAppGroupIDandHandleRichNotificationRequestmethods ofMORichNotificationclass as shown below
using System;
using Foundation;
using UIKit;
using UserNotifications;
using MoEngageXamarin.iOS;

namespace NotificationServices
{
    [Register("NotificationService")]
    public class NotificationService : UNNotificationServiceExtension
    {
        Action<UNNotificationContent> ContentHandler { get; set; }
        UNMutableNotificationContent BestAttemptContent { get; set; }

        protected NotificationService(IntPtr handle) : base(handle)
        {}

        public override void DidReceiveNotificationRequest(UNNotificationRequest request, Action<UNNotificationContent> contentHandler)
        {
            ContentHandler = contentHandler;
            MORichNotification.SetAppGroupID(<AppGroupID Set in Entitlement.plist>);
            MORichNotification.HandleRichNotificationRequest(request, contentHandler);
        }

        public override void TimeWillExpire()
        {
            ContentHandler(BestAttemptContent);
        }
    }
}
Rich Notification Media Limitations:
Refer to the following link to know about the size and format limitation for attachments(media) supported in Rich Notifications.
Http URL's aren't supported in iOS10 unless explicitly specified in the plist. You will have include App Transport Security Settings Dictionary in your Notification Service Extension's Info.plist and inside this set Allow Arbitrary Loads to YES.
IMAGE GUIDELINES:
- File Size: The maximum file size for image attachments can be 10MB.
- Dimensions: The maximum possible dimensions are 1038 x 1038 pixels. It can be anything smaller than 1038 pixels.
- Landscape vs Portrait: iOS supports both the orientations but we recommend using images that have a landscape orientation this is because depending on the dimensions, portrait images may look too tall.
Geofence Campaigns
To support geofence based campaigns in iOS, do the following:
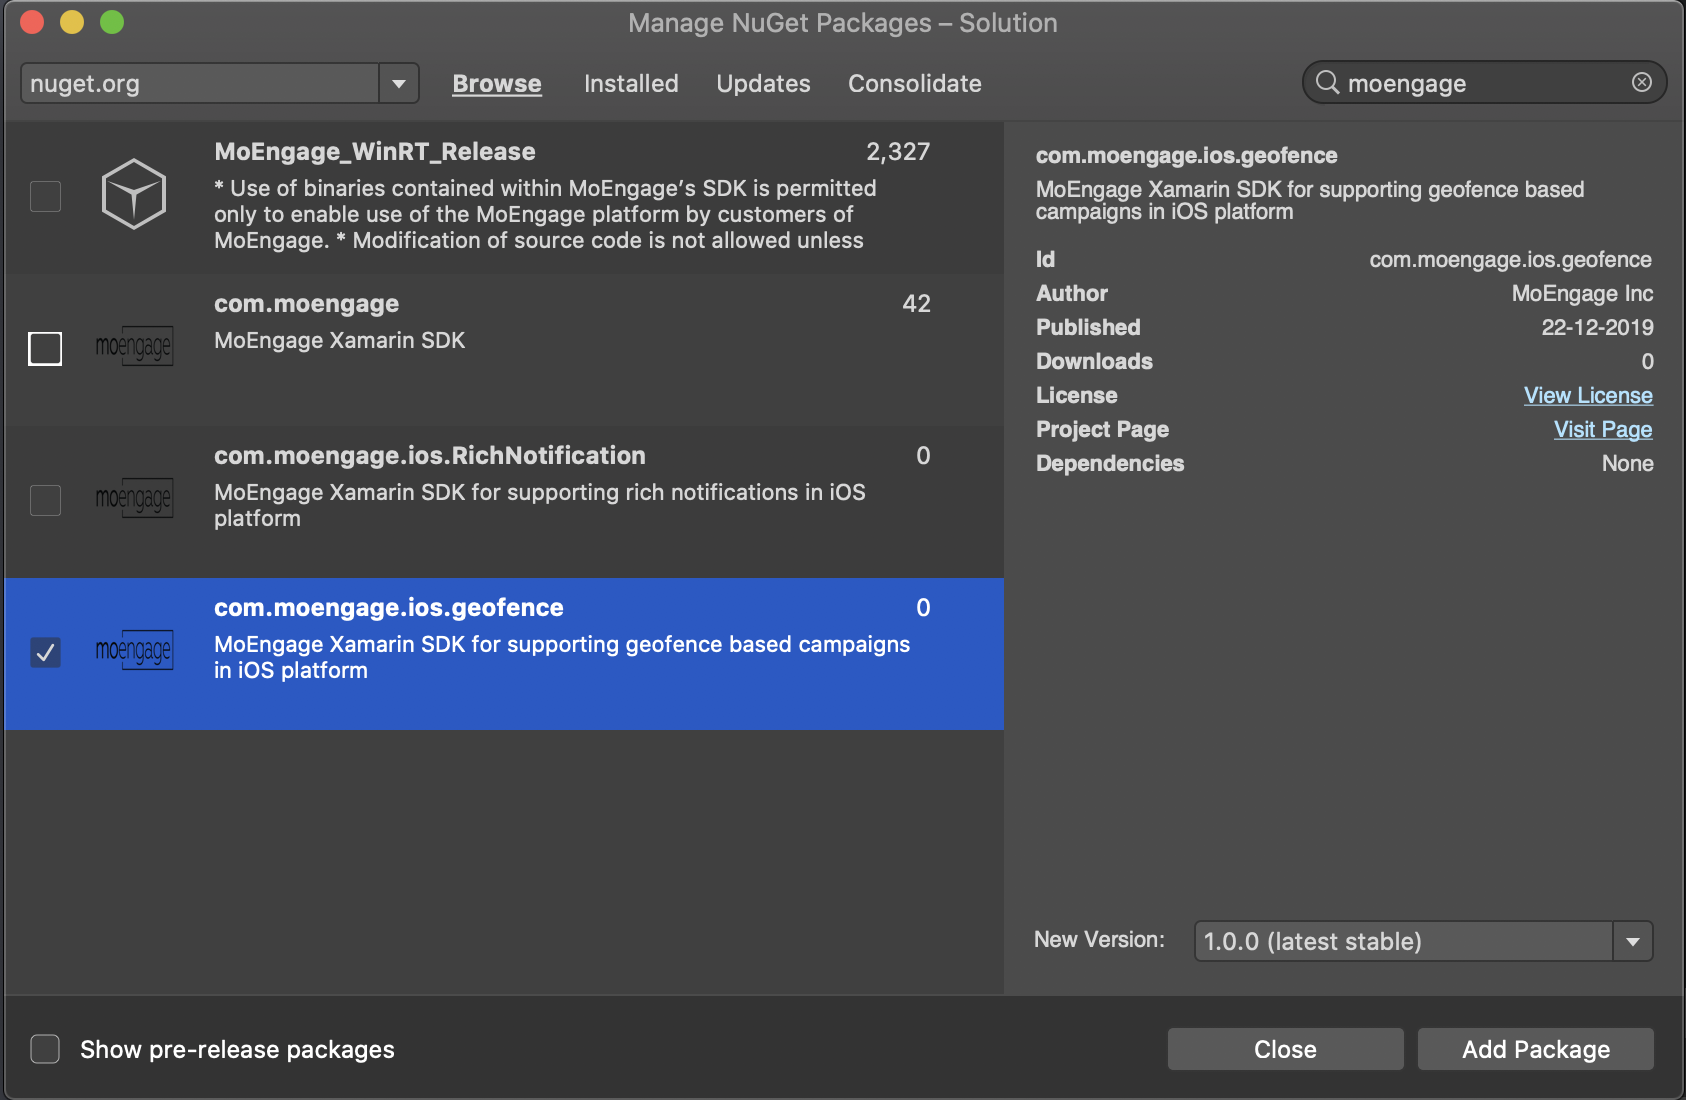
- Add
com.moengage.ios.geofencepackage to your iOS Project
- Call
StartGeofenceWithManagerpost obtaining user's location to initiate the Geofence module:
MOGeofenceHandler.SharedInstance().StartGeofenceWithManager(manager, locationCoordinates);
Updated almost 6 years ago
